

How To Prepare Garage Floor For Painting
This post is in partnership with Rust-Oleum.
I've had and so much success with other products from Rust-Oleum I was excited to apply their garage kit.
–TRANSFORM YOUR BATHROOM VANITY IN A WEEKEND!
–REFRESH YOUR OUTDATED TILE WITH Paint!
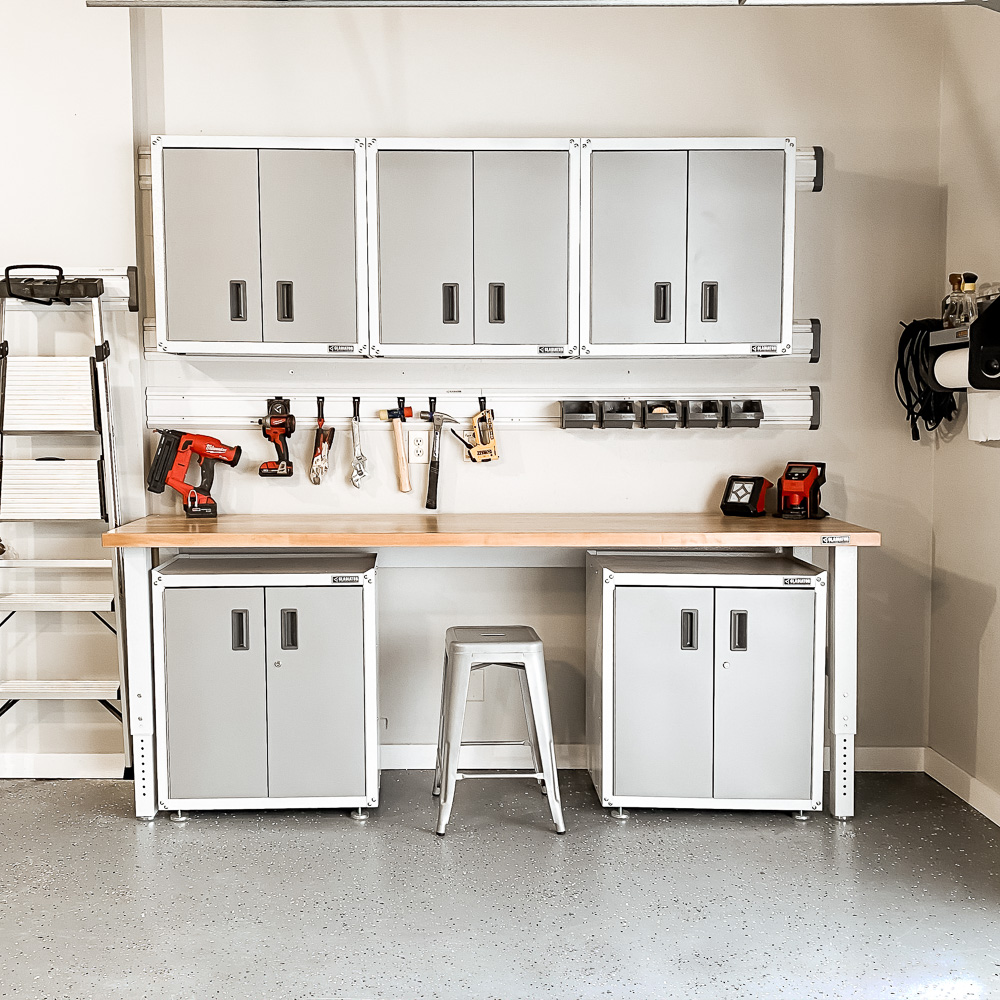
An organized and cute garage is the stuff my OCD dreams are made of! Merely with any finished infinite, the floors can make the biggest divergence in the feeling of a complete room. A garage is no different! I recently tackled the process of coating my garage floors with Rust-Oleum's RockSolid Garage Kit (using their dark grayness), and I couldn't be happier with how it turned out. I'm sharing my experience along with a few practise's and don'ts then you can tackle this projection with confidence.
WHY Glaze YOUR GARAGE FLOOR?
There are a lot of reasons to glaze your floor. The near obvious ane is the aesthetics that it provides but it likewise can provide great protection. Here's a quick list of the reasons that coating your garage floor is a win win!
- Durability against impacts, chemicals, and surface abrasions
- Resale value, a coated floor is more attractive to a buyer
- It will brand your unabridged garage feel put together and look better.
- It makes it easier to clean!
- Information technology can comprehend flaws and cracks in physical.
If you've decided you might want to requite this a try… here's how to do it.
THE PREP
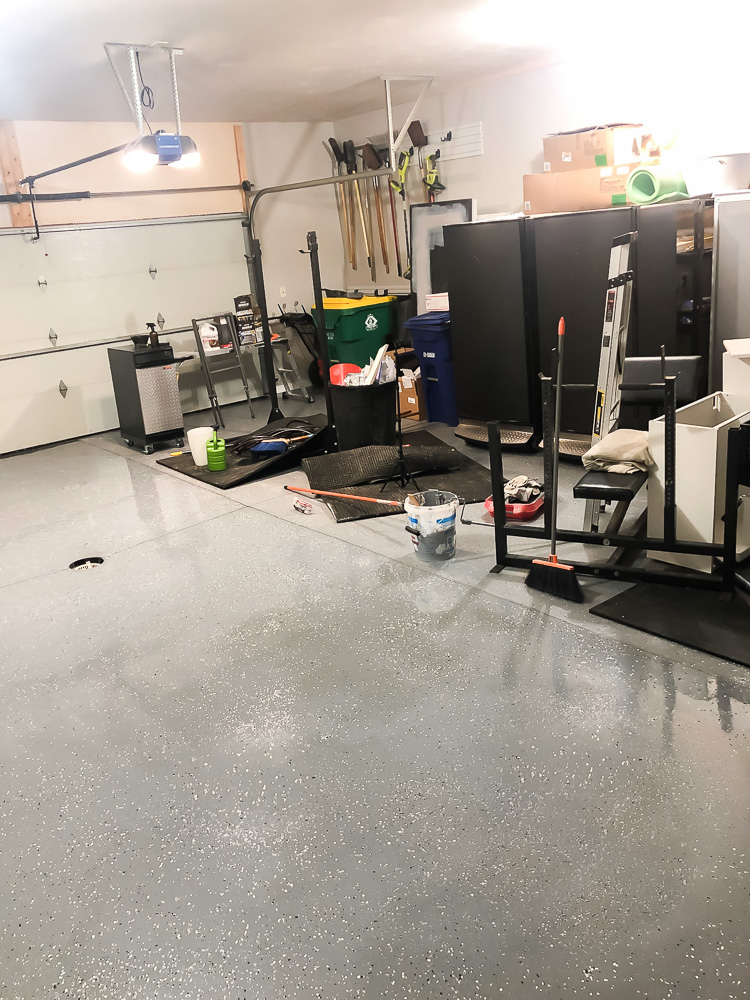
Clearing out an unabridged garage seemed a bit overwhelming to me… I decided to effort and tackle one side at a fourth dimension to brand this initial step a footling more than manageable. It does take a few more days overall by breaking it up this manner, but information technology takes a little pressure off! I took this photograph correct later I finished the second half. I was able to keep all of my "stuff" in the garage and had access to it past doing it this fashion.
The beginning pace to making this project successful is coming up with a plan to ensure you lot start with a clean and properly prepped flooring. Equally with whatever project, the PREP is key in getting long-lasting results.
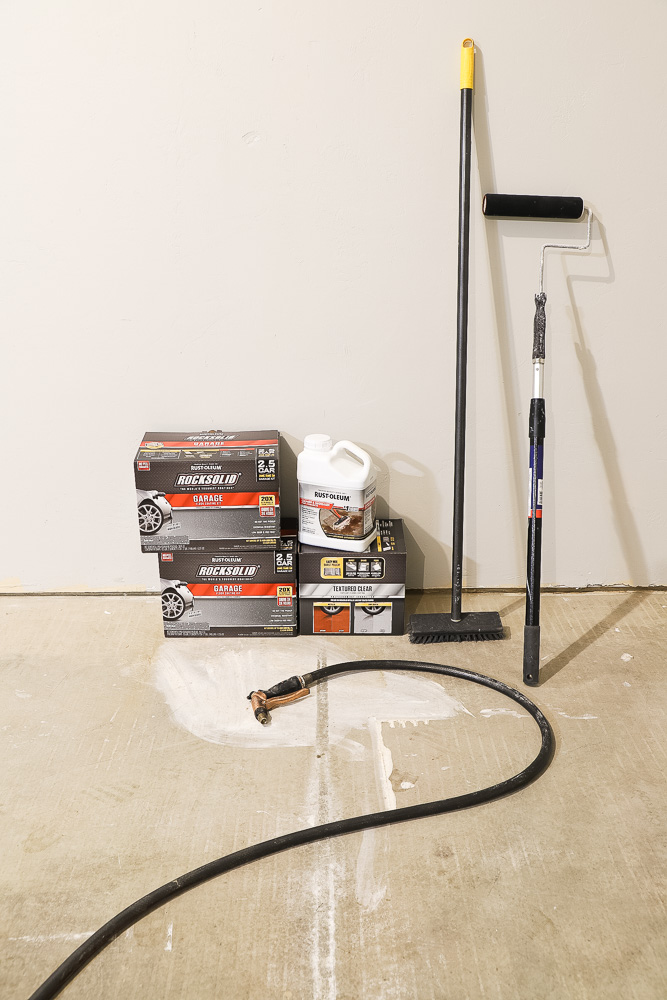
After clearing out half of the garage, I hosed downwardly the unabridged expanse to go near of the dirt out of the way. (Thank goodness for these center drains!) I and so used the Rust-Oleum Cleaner & Degreaser and poured it on total strength… followed by an aggressive scrub.
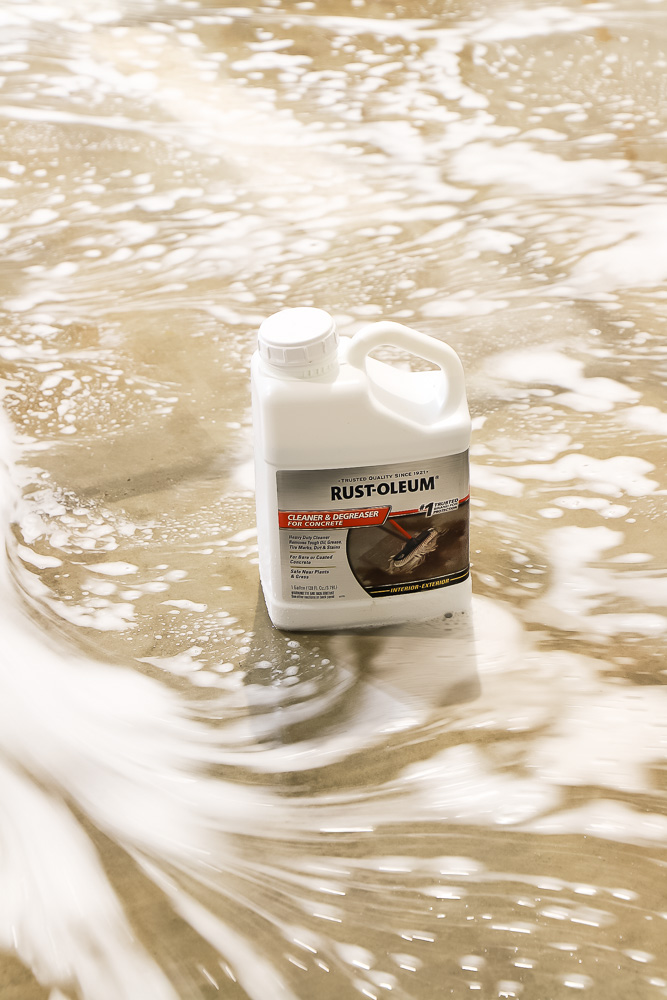
I will warn you that cleaning is literally the hardest role of this projection. I worked upwards a sweat but with all of my painting experience, I knew non to take whatsoever shortcuts with this step.
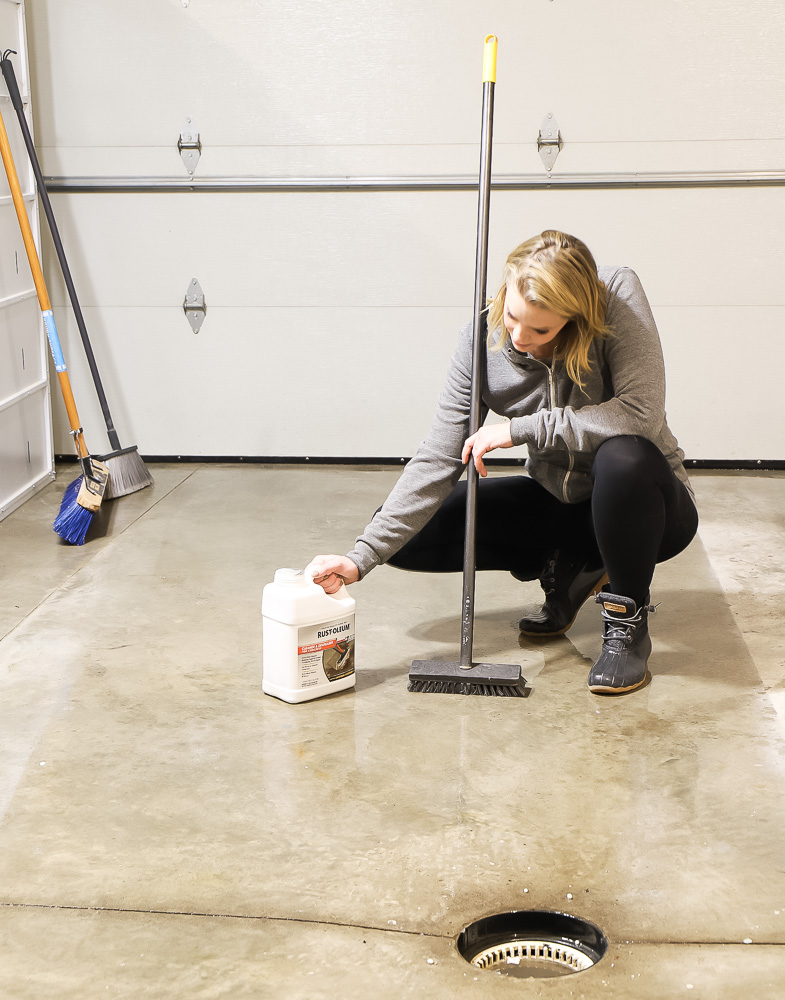
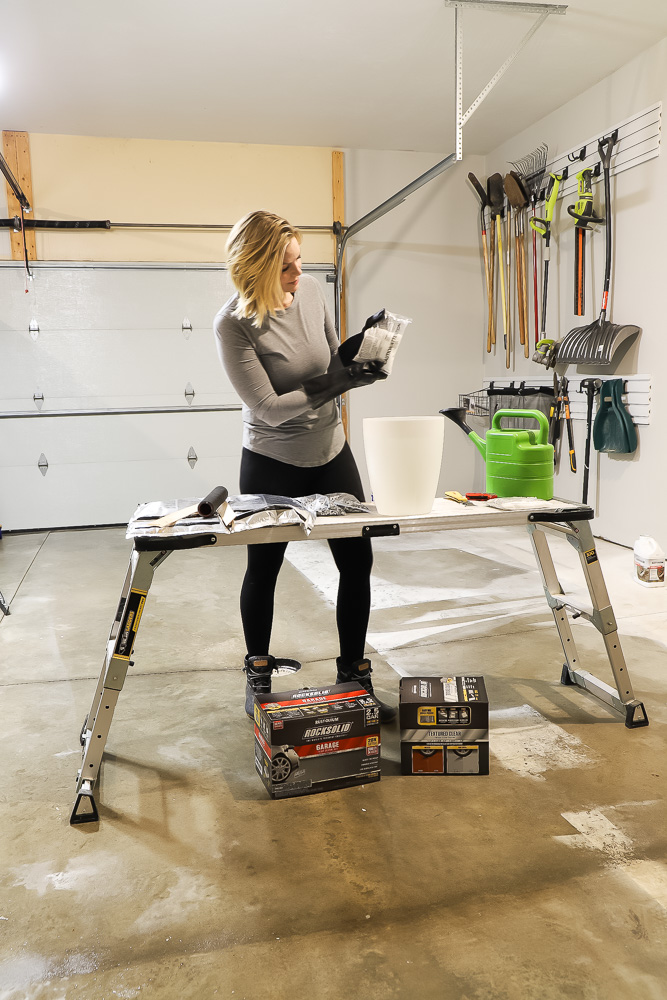
Next up was Concrete Etching. Concrete can exist too hard and shine to accept pigment or protective sealants… which is where etching comes in. The etching is essentially citric acid and serves to open up the pores of the concrete and prepares the surface to accept its side by side handling. I mixed the etching according to the instructions into an old flowering pot and poured information technology onto the clean concrete. I permit information technology sit for a couple of minutes and followed up with another lite scrub. The etching itself should practise about of the work.
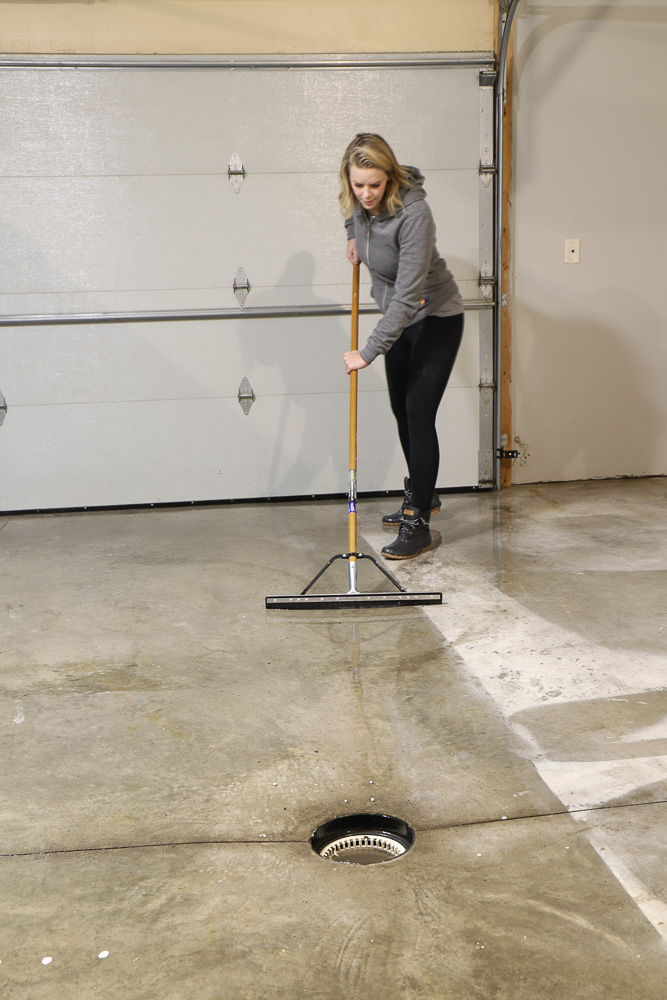
I fabricated sure to hose down the area over again and get all of the etching residues off of the floor. Using a squeegee actually helped to get most of the water off the concrete so it could properly dry out… which is key before moving on to the bodily coating of the floor.
My recommendation here is to await for at to the lowest degree 24 hours. I can guarantee you that yous will non go the results you desire unless your floor is completely dry… and in a higher place 50 degrees. I used this surface thermometer to ensure my physical was the right temperature.
THE Procedure
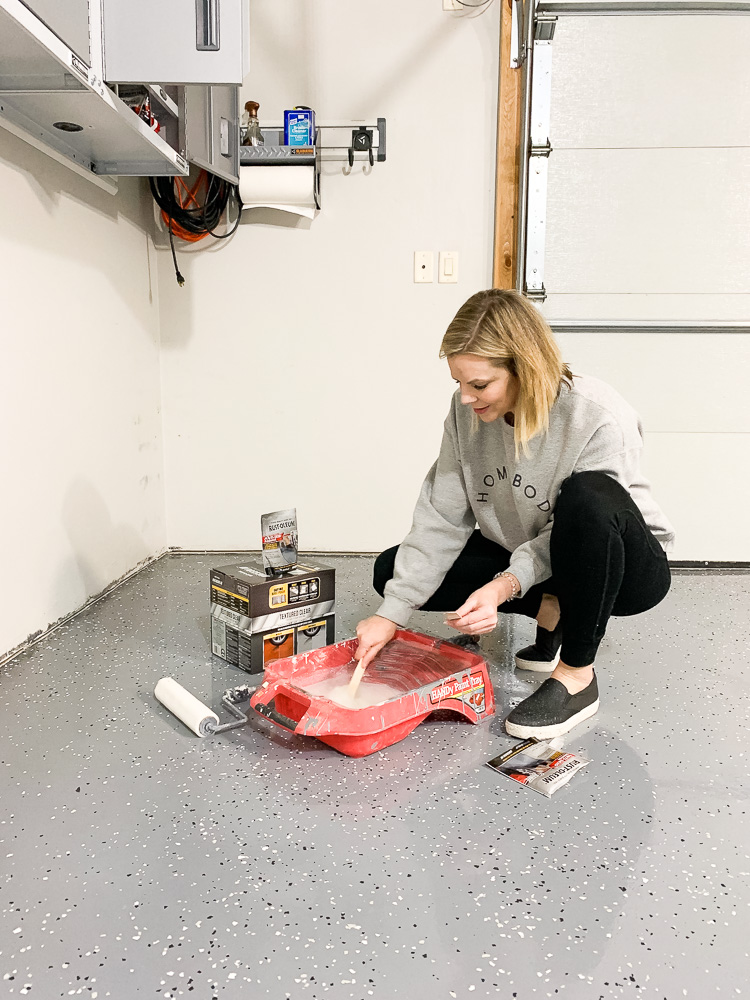
Here comes the fun part… and the role where I have some stiff opinions almost how to mix/pigment for the best results. I found that some of the bags had slightly different colors so y'all'll run across in the video above I mixed 2 bags together. This will give you the best shot at achieving a adept consistent color throughout. I also found thas using the recommended brush for the edges gave an uneven finish.

I chose to roll the entire flooring from a paint tray (not using a paintbrush at all). The instructions also recommend pouring from the bag… I but did not find this to be efficient at all and left a streaky finish. Note: Y'all will have to tape the edges if you lot don't program on covering them up with baseboards which I did.

Subsequently you roll a iii-4′ section, it's time to throw on the flakes! It'southward important to do this while it'due south all the same wet and y'all can reach the spot you need to throw them on. My technique involved throwing them upwards in the air and letting them autumn randomly! Skip this pace if paint fries are not the look yous are going for (I wish I would have washed more than) —information technology will not affect coating performance.
In that location are a lot of mixed opinions nigh how many coats to put on. I feel that one good coverage coat is adequate.
I waited 24 hours and tested for tacky spots before moving forward to the topcoat. I am using the textured articulate topcoat and added the Rustoleum anti-sideslip additive. I followed the same steps equally the coating and just stirred this additive in… making sure to stir as I painted as it wanted to settle a niggling bit. It is most like sand so information technology'due south important to keep it mixed equally you go for fifty-fifty distribution.
I besides decided to add together a PVC baseboard after the topcoat to really give this a finished expect. I can't believe how much of a divergence this made!
After this pace… you're done!
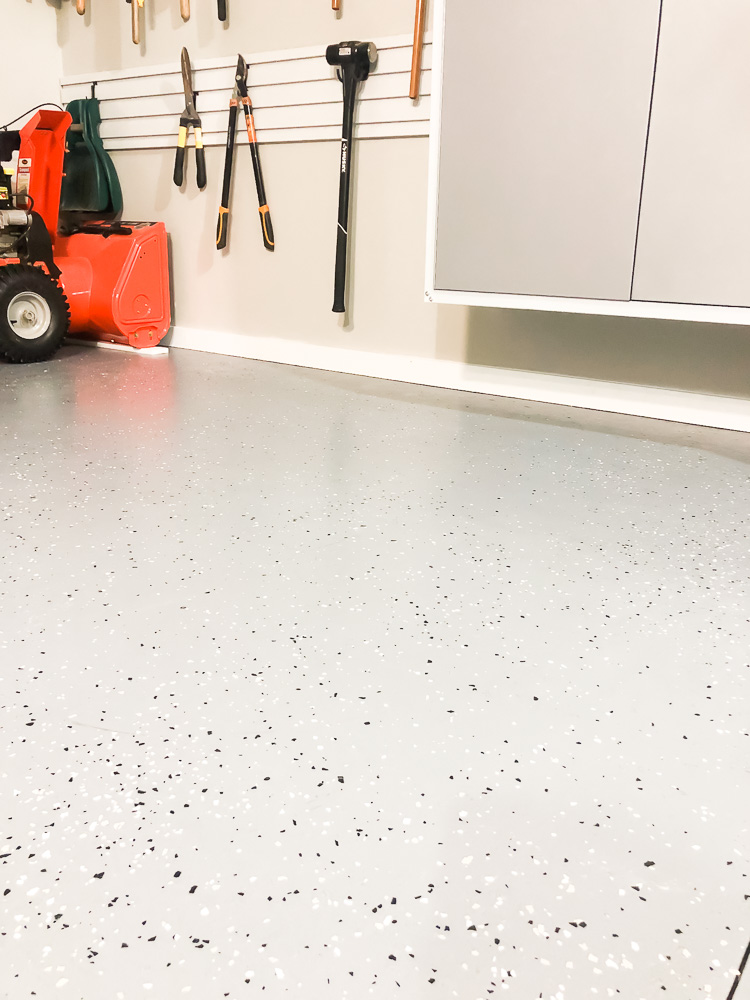
Here's a lilliputian before of an surface area of my garage.

And here's an AFTER!
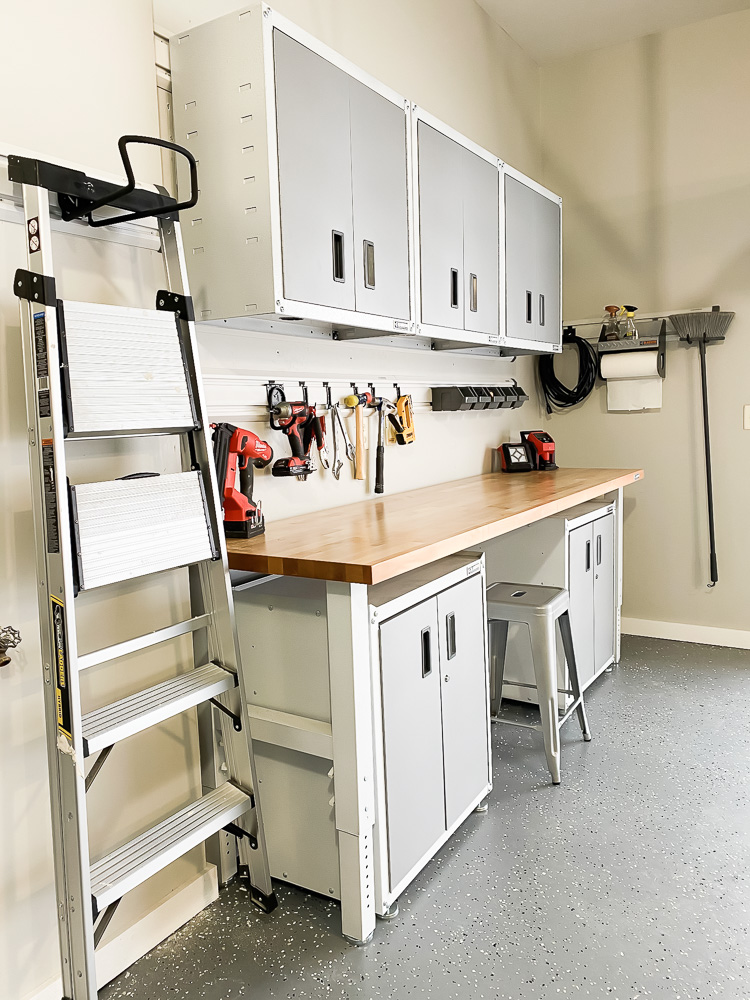
What a difference right? Here'south a few highlights if you want to think the key points in this project.
Practice:
- Take the extra time to thoroughly clean and dry your floor!
- Mix 2 numberless together if y'all can get them rolled in less than ane hour.
- Use a roller and paint tray to apply the blanket.
- Add a baseboard to your flooring… it makes all the divergence!
DON'T:
- Cut corners on cleaning/prepping your floor
- Start blanket your floor if there are any damp spots in the concrete.
- Use a paintbrush on the edges
- Pour out of the bag (utilize a roller tray)
- Exist Nervous! This is a painless project if you follow all the steps!
I am very happy with the last results of my flooring but I can tell you that I wish I would have added more flakes AND used a glossy summit glaze every bit opposed to matte. I might still exercise this in the spring/summertime. Other than that, I worked out all the issues for you on this project so you can go brand your garage floors cute with confidence!


Source: https://makingprettyspaces.com/2020/02/20/painting-your-garage-floors-dos-and-donts/
Posted by: moorefrehe1937.blogspot.com
0 Response to "How To Prepare Garage Floor For Painting"
Post a Comment